Installing drywall, also known as plasterboard, can be done either by a professional plasterer or by a competent DIYer. With the aid online video tutorials any competent DIYer can successfully install drywall. However, some procedures are much more difficult than the tutorials make them appear. With fantastic results appearing easy to achieve, but as most DIYers know it’s rarely as easy as the tutorials make out.
In this article we will be talking about stages of drywall installation that are easy enough for a competent DIYer and when to stop and leave it up to a plasterer to perform the drywall installation for you.
Stage 1 – Cutting Drywall Sheets to Size – DIY Friendly ✓
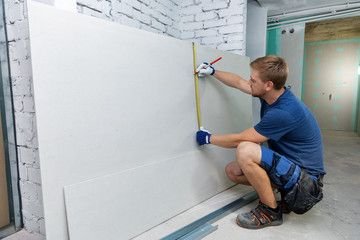
The first stage of a drywall installation project is to cut the sheets to size. This is a fairly easy task and can be successfully completed by a competent DIYer without too much hassle. It simply involves measuring the wall or ceiling space and cutting the sheets of drywall to fit the required space.
There are a variety of methods for cutting drywall sheets. The simplest and cleanest way to do so is the score and snap method. Using a straight edge, ruler and pencil mark the section of drywall you wish to remove. Then take a utility knife and score the drywall sheet. Hang the piece you want to remove over a ledge and place firm downward pressure to snap the sheet. If done correctly the sheet should snap along the score mark you previously created.
Hand saws, oscillating and rotary saws are among the many tools you can use to cut holes for power outlets and switches, ceiling lights etc. Cutting holes is the easy part, getting accurate measurements for where the holes should be is the difficult part.
Stage 2 – Fastening the Drywall to a timber frame – DIY friendly ✓
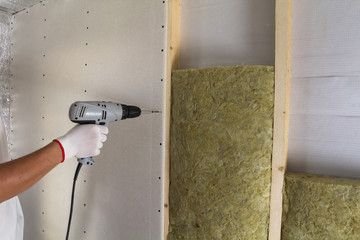
Once your sheets have been cut to size, you’re ready to secure them to the timber framework. This process is straight forward and DIY friendly. Simply fasten the precut sheets of drywall into place using the appropriate fastener.
Typically, drywall sheets are secured using either drywall nails or drywall screws. The exact fastener you use will depend upon the specifics of your project. The local hardware store person should be able to provide you with the right product for your needs.
When fastening drywall sheets, it’s a good idea to have an extra set of hands or two to hold the sheets in place while you secure them. You may want to consider hiring a panel lift to hold sheets in place while you secure them, especially when working on a ceiling. Holding large sheets of drywall overhead can become very tiresome.
Ensure that fasteners are counter sunk below the adject drywall surface so they can be plastered over later on. This will give the wall a smooth seamless finish.
Stage 3- Mudding, taping, and sanding – Not so DIY friendly ✖
Now that the drywall sheets are secure it’s time to mud, tape, and sand the joints to make the final product appear like one smooth seamless surface. This is where it gets a bit tricky. Though it’s not necessarily difficult to perform these steps, but to do so and get a quality finish does require considerable skill and finesse which practise and time to develop.
If you’re seeking a flawless finish, then it’s best to leave this step to a professional plasterer. If you’re not concerned about joints being visible under certain lighting conditions you could give this step a crack.
Here’s what you’ll need to do
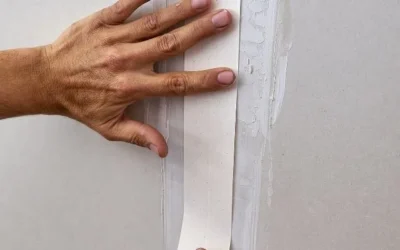
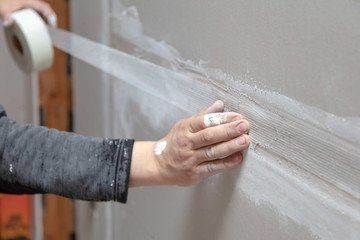
Apply a liberal coat of plaster joining compound, often referred to as mud, over the joints. Then apply a sheet of drywall tape over the joint you just applied the mud to. Then take a drywall putty knife and press the tape into the mud. Use the putty knife to wipe off excess mud so the surface is smooth then leave to dry.
Once dry give the area a light sand to remove any irregularities in the surface. Then apply a second layer of joining compound this time using a wider putty knife than used previously. Try to feather the edges to blend it into the adjacent surface. Allow to dry.
When dry sand the area once again and apply a finishing compound using a slighter wider putty knife than previously used, once again doing your best to blend the join into the adjacent surface. Allow to dry before giving it one last sanding with a fine grit sandpaper in preparation for painting the surface.
To install drywall DIY or to hire a professional?
Now you’ve got a basic idea of what it takes to install drywall you can better determine whether to undertake the project yourself or hire a professional. As outlined the first two stages of drywall installation are generally pretty straight forward and can be done DIY.
The plastering stage does require considerable skill in order to get a seamless finish. Professional plasterers use high quality tools which together with their experience allows them to complete the job to a higher quality and in much shorter period of time compared to the equipment available to your average DIYer. Of course, you could go and purchase the equipment yourself but the cost to acquire them would counteract the savings of DIY.
Looking for some assitance with your drywall project?
If you’re after a Sydney plasterer to install drywall in your property, or just to finish off your drywall installation project, give Paul from Paul’s Plastering a call. With over 15 years of plastering experience Paul has seen it all and is eager to help Sydney homeowners realise their renovation dreams. Call today for a friendly obligation free quote.

Get a Free Quote
On your next plastering job, no matter how big or small give Paul a call and he’ll give you some honest advice and a fair quote. With 15 years experience, fully licensed and insured you’ve got nothing to lose by getting a quote

