There are many reasons you may want to remove drywall from your home. You might be renovating your home and wanting to remove internal walls, installing an air conditioning duct, or you might be simply repairing a small section of damaged wall.
Removing drywall sheeting might seem like a daunting task, however, it’s actually fairly simple. Follow this helpful guide to find out how to remove drywall sheeting from your home.
Preparation
Before you and bark on your drywall removal project a couple of things you need to do first.
Turn off all utilities
It’s very common for utilities such as electrical wires plumbing pipes listening pants to be located inside a wall cavity. You can use a good quality stud finder give you an indication of what lies behind the wall cavity the drywall sheet you are intending to remove. However always a good idea to turn off all utilities before conducting any drywall sheeting removal project.

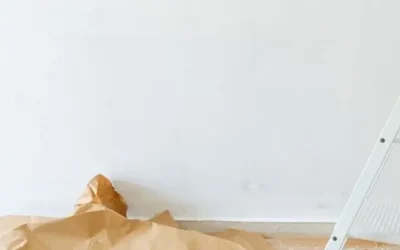
Prepare the room
Removing drywall sheeting can be a very messy affair, drywall dust can easily become airborne and settle on furniture, windowsills, and even on the walls themselves. The last thing you want to do is spend hours cleaning up after your project. To minimize clean-up time, it’s wise to prepare the room. Do this by removing all unnecessary furniture and isolating the workspace as much as possible by closing doors and windows. If it’s not practical to move furniture another option is to lay down some plastic drop sheets over the furniture to prevent drywall dust settling on it. The scope of your drywall sheeting removal project will determine the level of room preparation will be required.
Tools and Equipment required
- Dust mask
- Utility knife
- Drywall saw
- Hammer with claw
- Prybar
- Stud finder
- Masking tape
- Strong magnet
- Drill with screwdriver bits
Section 3: How to remove plasterboard sheets
- Use the stud finder to locate utilities and areas where you need to exercise extra caution. Mark these areas with masking tape
- Remove mouldings. Depending upon the scope of your project you may need to remove skirting boards or baseboards and window moulding and cornices, anything which is attached in front of the drywall sheeting.

3. Using the utility knife cut the drywall tape along the edges of the section of drywall you wish to remove. For an entire wall this will be in the corner, and possibly the ceiling line, plus sections where individual sheets join. If you are unsure where sections of drywall sheet join up, simply go to the next step cut drywall tape when you identity where it is.
4. Using the magnet locate the fasteners. Drywall will be fastened to the timber framework via nails or screws. Determine if the drywall is attached by nails or screws.
- If screws have been used use the drill and screwdriver bits to remove screws. Continue using the magnet and drill to locate the screws and remove them. Until all screws from the entire sheet or section you wish to remove have been removed.
- If the drywall has been nailed to the framework the easiest way to remove the drywall sheet is to pry one section of the sheet up and gradually work your way across. To do this start at a corner if possible. Otherwise create a hole in the drywall using the prybar. The goal is to make a segment of the drywall you can pry up and loosen the sheet. If the sheeting breaks simply repeat the process. Continue until entire sheet or section you wish to remove has been removed. If you’re just removing a specific section of drywall, use a drywall saw to cut a clean edge.
5. Remove remaining nails from timber framework. Use a claw hook hammer or prybar to remove any remaining nails.

Removing drywall sheeting is not too difficult a task and can be completed by a competent DIYer with a few common tools.
If you get stuck during your drywall removal project or simply don’t have the time or tools to do the project yourself you can always contact your local drywaller, plasterer or handyman to come around the do the job.
Looking for a great plasterer for your home renovation?
If you’re located in the Sydney area or are doing renovation works in the Sydney area and looking for a plasterer then get in touch with Paul from Paul’s Plastering for an obligation free quote on your renovation job.
Looking for an affordable plasterer?
Contact Paul for a free quote on your renovation or repair project. With 15 years experience, fully licensed and insured you’ve got nothing to lose by getting a quote